Have you ever acted like a tourist in your own town? It's amazing the random things that you find when you are on a mission to discover "what to do" around your neighborhood. My friend Rachel and I did this a few weeks back. Originally we were going to take the train to Chicago and romp around the city all weekend but in an effort to save money, we opted to do a staycation in East Central Illinois and explore the random things around our neck of the woods.
We started off the morning by waking up to snow. NOOOOOO!!! Weather always finds a way to ruin my golf game so it would be fitting that it would find a way to ruin a fun outing. Rachel and I had a start time of 9am planned but we decided to wait until 10 to see if the sun came out. At 8:45, the sun came out. Hooray!
Our first stop was Ashmore and the
John Deere dealer out there which is the 2nd largest online retailer in the world (supposedly).

I was sooo cold that i couldn't even think about taking my hands out of my pockets. Like secret agents, we stopped right inside the lot and left the car running while we took our pictures. Just as quickly we jumped back in the car and were off to our next stop.
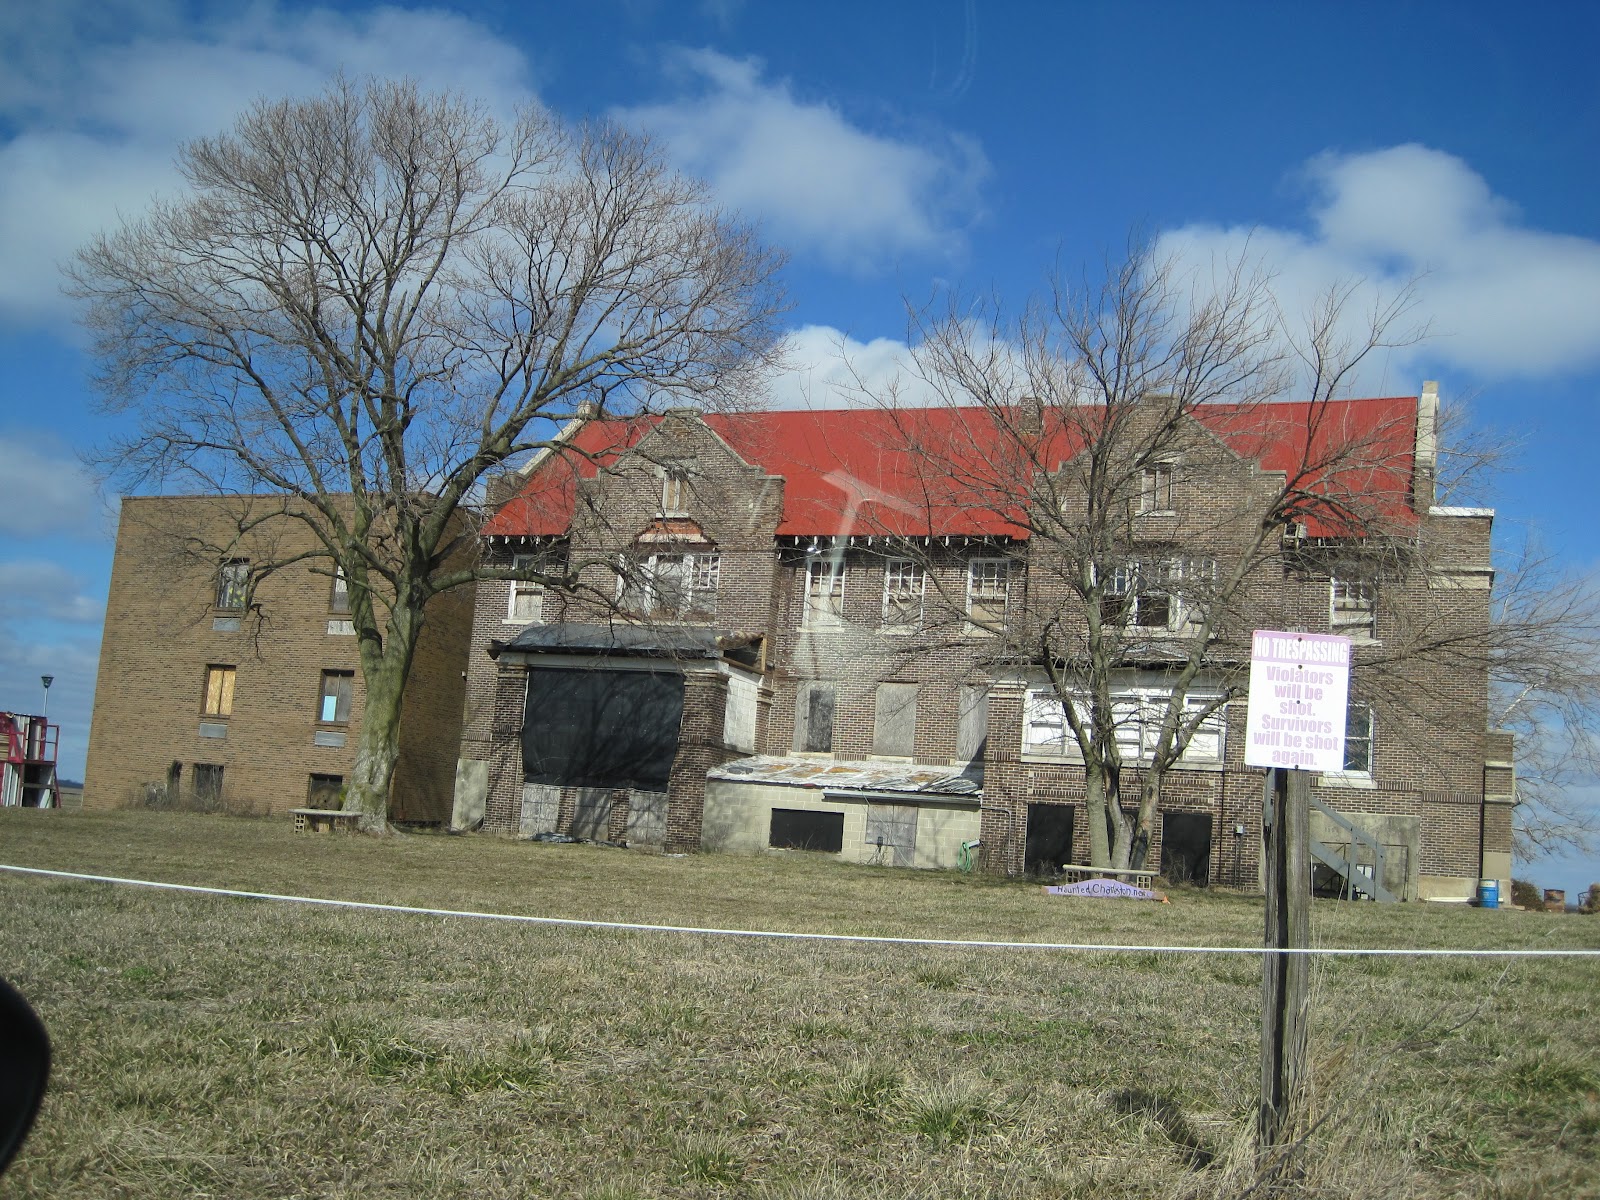
Then we went through the country roads or should i say that we got lost in the country roads as we were trying to find a certain County Road. This was an adventure between the GPS (that showed that we were in the middle of open space), the google map on my blackberry (that showed that it would be a simple right turn), and the email of directions (that made absolutely no sense). On a drive-by we stopped at
Ashmore Estates which if you are a fan of Ghost Adventures, you might recognize the site from several episodes.

After a general consensus that we should head towards the treeline, we found the
Airtight Bridge.


The story behind this bridge that it was a drinking spot for local high school and college kids until October 19, 1980 when a decapitated body was found by two guys driving by.
After our adventure in the middle of the cornfields and the Embarras River, it was lunchtime. Locals of East Central Illinois will tell you about this place called Moonshine which is known for their burgers. The things is, that if you don't know where it is, there is no way that you would ever run into it.
According to the GPS, the
Moonshine Store is over the river and through the woods and past a heard of cattle.
This poor calf got out of the fence and was standing next to the road. But on the way there and back we were greeted with "fluffy cows.
But back to the food... we were in a race against the clock since Moonshine turns off their grill at 12:30pm, no excuses. Thankfully we made it and arrived at the store with 15 minutes to spare.

I went with the bacon cheeseburger and let me tell you... It was delicious!!
They have a table set up in the middle of the store with "all the fixins" that you could ever want on your burger. It was fabulous.
After we fill up on burgers, chips, and sodas, we were back on the road for the next adventure.
This time we were off to Greenup but we had to pass by OREL and EARL's place. Small towns make me laugh simply because people put their names on signs which clearly identify who they are. This would never happen in a large city. Too many scary people out there in the world. But it's fun to know that there are still people and towns out there were everyone knows your name and trust is something that exists among the local.
The next stop on our tour of the area was the
Covered Bridge in Greenup. After some wandering we found the RV/Truck Parking which had a walking trail that would take you to the bridge.
So imagine this... You are standing on the sidewalk looking at the bridge with no one around you when you hear the sound of a chain saw power-up. Rachel and I both screamed like we had just found ourselves in the middle of a horror film. This situation had all of the makings of it: middle of nowhere, nobody around, random sounds of terror.
Other than the slight fright, the bridge is kinda cool. Along the beams in the bridge are spots where people have carved mementos of love and hate throughout the bridge.
Illinois and Indiana are full of covered bridges, there are even festivals devoted to the covered bridges throughout the states.
The next order of business was
Cameo Vineyards in Greenup.
This vineyard is locally owned and operated by a young couple. A little side note for my West Coast Vintners: the California grape cannot be grown out here so the wines tend to be lighter and less bold. The closest that i could get to a Sauvignon Blanc was their Canoe Blend which is tasty.
After tasting a variety of their blends we each settled on a glass and enjoyed the local wine enthusiasts as they enjoyed their Saturday.
After relaxing for a few moments at the winery, we made our way to Mattoon and the
ice cream cone shaped ice cream shop. This little shop is across the street from a park so i can imagine that during the summer months and the heat and humidity, that there is a hefty line out front of this place.
Since it was windy and freezing, Rachel and I had no desire eat any ice cream. Season restaurants and shops are a usual occurrence around here and this little shop falls in line with it. They are closed during the winter months but that did not stop us from taking a photo of this place.
Then we went to Gays and the home of the
two-story outhouse. This outhouse used to stand at the rear of a general store.
So how does a 2 story outhouse work? That was my question....
The upper and lower-floor holes are placed on opposite sides, and the first floor has a second inset wall which provides the "chute" for your business. This outhouse has been around since the 19th century even after the store was torn down.
It sits on the corner of Pine St in a small park strictly for the purpose of promoting the outhouse and it's history.
And our last stop on the tour of East Central Illinois was the "
fastest soda pop machine" in Lerna. It even has it's own facebook page!
75 cents of sheer amazement. Rachel put the money in and her soda came out the bottom. There was no waiting for the soda to dispense or "fall through the machine. It was instant, as if the machine knew what she was going to get.
The soda was cold for a long while too. We drove home and it was still cold.
This staycation was so successful that we are already plotting our next one. Corn mazes in the fall, Lakes/Watering holes in July, or who knows what else...